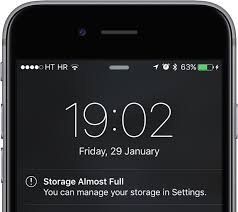
Do you find yourself constantly running out of space on your iPhone or iPad? It’s likely because you have a device with the minimum amount of storage—16GB. Apple designed the 16GB iPhone for organizations to give to employees that needed only minimal capabilities on their device, like making phone calls and reading email.
Whether someone gave you a 16GB iPhone, or you thought you’d save a few bucks, you probably know by now that you can’t increase the storage of your iPhone. You also may have thought that the entire 16GB of storage was yours to use, without realizing Apple can take up to 3.5 GB for the iOS update and other system services that are essential to operating your iPhone.
This leaves you struggling to find enough space for software updates, frantically deleting apps and photos to reclaim space. With a 16GB iPhone, you are also missing out on fully leveraging your iPhone, like your friends and family that have 32GB or 64GB iPhones.
Here are 7 steps to managing a 16GB device:
Step 1 – What is using the most storage?
To take a look at what is using the most storage:
Go to Settings > General > Usage > Manage Storage
You’ll see a summary of how much storage you’ve used and what is available.
You’ll also see a list of apps and the amount of storage they are using. Start with the app using the most storage and decide if you want to keep it or not.
Step 2 – Delete unused apps
Deleting apps not only frees up the space the app was using, but it frees up space the documents and data for the app were using too.
To delete an app, press on any app, holding it down until they all start to wiggle. You’ll see an ‘x’ in the upper left corner of the app. Select it and the app is deleted.
You can easily download it again by searching the App Store. If you’ve dowloaded the App, you’ll see the Cloud symbol. That means it will be downloaded from your iTunes library and you won’t have to pay for it again.
Step 3 – Delete old messages
If you have a lot of old messages in the message app, they can be using up a ton of space—especially if you like to send photos or videos.
To delete a specific message, open Messages App > Scroll down to find the messages you want to remove > Swipe to right > Select Delete to remove the message.
This deletes the entire message thread with that person, including any photos or videos they sent to you.
You can save photos or videos by viewing message details (select the “i” in the upper right), then opening images you’d like to save and saving them to your photos.
Remember that deleting messages also deleted
Read our blog post on how to automatically delete old messages – here
Step 4 – Clear Safari browsing history
When you browse the Internet using Safari, your search history is saved and also any data that goes along with it. If you use Safari a lot, this space can add up.
To delete website data in Safari:
Go to Settings > Safari > Advanced (all the way at the bottom) > Website Data > Remove All Website Data (turn it on). You can see that is using data. At the bottom, select “Remove All Website Data”.
To clear your history and data on Safari:
Go to Settings > Safari > Clear History and Website Data and select “Clear History and Data”.
Step 5 – Review Burst Photos
When you hold down the camera shutter to take a picture, your camera takes a succession of photos, called a Burst. This is handy when you’re trying to capture an action shot, but many people accidentally take burst photos.
You can find your Burst photos by going to the Photos App and selecting the Bursts album.
If you open a Burst photo, you can delete it, by selecting the Trash can in the bottom right.
Or if you want to see individual photos captured during Burst, select “Select…” in the bottom center.
You will be able to scroll through all photos in the Burst, selecting the ones you want to keep. You’ll get another screen asking if you’d like to “Keep Everything” or “Keep Only x amount of Favorites”.
Step 6 – Prevent duplicate HDR photos
When taking a picture, you can turn on HDR mode, which blends the best parts of three separate exposures in to one photo.
You get amazing pictures using HDR, but you also can get duplicate photos saved to your device.
Here’s how to prevent duplicate photos when using HDR:
Go to Settings > Photos & Camera > Keep Normal Photo (at the very bottom) and turn it OFF.
Step 7 – Leverage iCloud
Make sure your iPhone is set up to use iCloud. Apple provides 5GB of free storage, which likely isn’t enough to back up your iPhone. You can buy 50GB of storage for .99 cents a month. That’s less that $12 a year for 50GB of storage.
To set up iCloud, or verify you’re using it, Go to Settings > iCloud and enter your Apple ID.
To buy more iCloud storage, Go to Settings > iCloud > Storage > Change your storage plan.
You can then go to iCloud.com and enter your Apple ID and password to find all of your stored pictures, apps, music, etc.
Don’t have space issues on your iPhone? Maybe you know someone who does. Share this information with them.


Comments are closed.